Customized Cotton Blanket Making Tutorial
Welcome to our Customized Cotton Blanket Making Tutorial! In this comprehensive guide, we will walk you through the process of creating your own personalized cotton blankets. Whether you're looking for a unique gift or a cozy addition to your home, this tutorial is perfect for beginners and advanced crafters alike.,First, let's start with the basics. We'll need to gather our materials: high-quality cotton fabric, sewing thread, scissors, and any embellishments you'd like to add, such as buttons, zippers, or embroidery. It's important to choose a fabric that is soft and comfortable for use.,Next, we'll need to cut the fabric into the desired shape and size for your blanket. You can use patterns or create your own designs based on your preferences. Once the fabric is cut, it's time to sew it together. We'll discuss different sewing techniques and tips to ensure your blanket turns out perfectly.,After the blanket is sewn, you can add any decorative elements you like. This could be anything from simple buttons and zippers to more intricate embroidery. Once everything is complete, your customized cotton blanket is ready to be used and cherished.,In conclusion, making your own customized cotton blankets is a rewarding and creative process. With our step-by-step tutorial, you'll be able to create beautiful, one-of-a-kind blankets that are perfect for any occasion. So why wait? Start your crafting journey today and create something special for yourself and those you love!
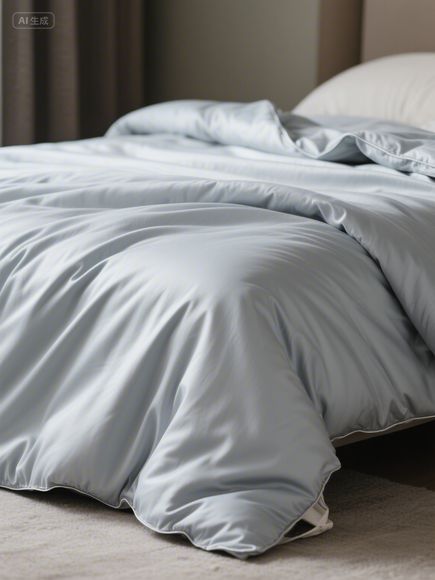
In this tutorial, we will guide you through the process of making a customized cotton blanket. Whether you want to add your unique touch to a gift or create a cozy bed for yourself, this guide will help you make a beautiful customized cotton blanket.
Table 1: Materials Needed
| Material | Quantity |
|---|---|
| Cotton Fabric | 500 grams |
| Scissors | 2 pieces |
| Ruler | 1 piece |
| Pencil | 1 piece |
| Fabric Paint | 1 bottle |
| Embellishment | 1 box |
| Scissors | 1 piece |
| Fabric Glue | 1 bottle |
Table 2: Instructions
| Step | Instructions |
|---|---|
| 1 | Cut the cotton fabric into the desired size and shape for the blanket. |
| 2 | Measure and mark the center of the fabric. |
| 3 | Draw the pattern you want to follow on the fabric using a ruler and pencil. |
| 4 | Cut out the pattern. |
| 5 | Fold the fabric along the marked center line. |
| 6 | Apply fabric paint to the entire surface of the fabric, including the edges. |
| 7 | Use scissors to cut out the pattern. |
| 8 | Apply fabric glue to the back of the fabric, place the embellishments, and press down. |
| 9 | Allow the glue to dry completely. |
| 10 | Cut the excess fabric from the edges. |
| 11 | Sew the edges of the blanket using a sewing machine or needle and thread. |
Q&A
Q: What materials do I need to make a customized cotton blanket? A: You will need 500 grams of cotton fabric, scissors, a ruler, a pencil, fabric paint, embellishments, scissors, and fabric glue.
Q: How do I measure and mark the center of the fabric? A: Use a ruler to measure the length and width of the fabric, then draw a line through the center. Mark the center point on both sides of the fabric.
Q: What pattern should I draw on the fabric? A: You can choose any pattern you like, such as geometric shapes, abstract designs, or images of your choice. Make sure the pattern is large enough to cover the entire surface of the fabric.
Q: How do I apply the fabric paint? A: Apply a thin layer of fabric paint to the entire surface of the fabric using a brush or roller. Make sure to cover all areas, including the edges. Allow the paint to dry completely before proceeding.
Q: What should I do after the glue dries? A: After the glue dries, cut the excess fabric from the edges and sew the edges of the blanket using a sewing machine or needle and thread.

Case Study
Let's say you want to make a customized cotton blanket for your friend as a gift. You can follow the steps in this tutorial to create a unique and personalized gift. First, you need to choose a design that your friend will love. Then, measure and mark the center of the fabric, draw the pattern, and cut it out. Fold the fabric, apply the fabric paint, and cut out the pattern. Apply the fabric glue to the back of the fabric, place the embellishments, and press down. Allow the glue to dry completely, cut the excess fabric from the edges, and sew the edges of the blanket. Finally, your friend will receive a beautifully customized cotton blanket as a special gift.
Product Advantages
Our customized cotton blankets offer several advantages. Firstly, they are made from high-quality cotton fabric, ensuring comfort and softness. Secondly, you can choose from a wide range of patterns and designs to create a unique and personalized blanket. Thirdly, our tutorial provides step-by-step instructions, making it easy for anyone to make a customized cotton blanket without any prior experience. Finally, our customer service team is always available to assist you with any questions or concerns.
Expanded Knowledge:
Hey everyone! Today, we're diving into the cozy world of custom quilt making, specifically focusing on the delightful process of creating your own personalized cotton quilt. Whether you're a seasoned quilter looking to add a unique piece to your collection or a complete beginner wanting to try something cozy and creative, this guide is here to help you every step of the way. We'll cover everything from understanding the basics to finishing touches, and along the way, we'll touch upon why choosing high-quality materials, like those from Jia Yu Textile Factory, can elevate your quilt to new heights of comfort and durability.
Let's start by understanding what makes a custom quilt special. Unlike store-bought quilts, a custom quilt is tailored to your specific needs. This could mean the exact size you need, the perfect blend of fabrics for your personal style, or the specific filling that offers the ultimate comfort for your sleeping preferences. It's all about creating something uniquely yours.
Materials Needed: Your Quilting Toolkit
Before we get our hands dirty, let's gather the essential materials. Don't worry, you don't need a massive arsenal of quilting tools to get started! Here's a basic rundown:
| Material Category | Essential Items Needed |
|---|---|
| Fabric | - Top Fabric (Outer Layer): Choose a durable, comfortable fabric like 100% cotton. Consider patterns and colors that complement your room or personal style. - Batting (Filling): The middle layer that provides warmth. Cotton batting is a popular choice for its breathability and softness. - Backing Fabric (Inner Layer): Similar to the top fabric, often chosen for its feel against the skin or for color coordination. |
| Needles & Threads | - Quilting Needle: Typically a sharp needle, size 8 or 9, is ideal for most cotton quilts. - Thread: Choose a strong, durable thread like cotton or polyester. Matching the thread color to your fabric can be a nice detail. |
| Cutting Tools | - Rotary Cutter & Mat: Essential for straight, precise cuts. - Scissors: Sharp fabric scissors for cutting curves and smaller pieces. - Cutting Guide: Helps maintain consistent seam allowances. |
| Measuring & Marking | - Measuring Tape: Crucial for accurate measurements. - Pencil or Marking Pen: To mark fabric for cutting. |
| Piecing Tools | - Sewing Machine: The heart of quilting! Ensure it's well-maintained. - Pins or Clips: To hold fabric layers together. - Seam Ripper: A lifesaver for fixing small mistakes. |
| Quilting Frame or Batting Roller | - Optional but helpful for stabilizing the quilt layers while quilting. |
| Optional Embellishments | - Buttons, embroidery thread, ribbons, etc., for adding personal touches. |
Step-by-Step Quilt Making Process: Let's Get Quilting!
Now, let's break down the process into manageable steps. Remember, practice makes perfect, so don't get discouraged if your first few attempts aren't flawless!
Step 1: Planning Your Quilt
- Define Your Size: Measure the space where the quilt will live (e.g., bed, couch, wall hanging). Add a few inches for folds and wear. Standard sizes are often used, but custom quilts can be any size!
- Choose Your Style: Do you want a simple patchwork, a specific pattern (like a log cabin or star), or a more modern design? Research different quilting styles for inspiration.
- Select Fabrics: Gather your fabrics. Consider the feel, color palette, and how they coordinate. You can use solid colors, prints, or a mix of both. Jia Yu Textile Factory offers a wide range of high-quality cotton fabrics known for their softness and vibrant colors, perfect for creating a quilt that feels luxurious.
- Choose Your Batting: This is key for warmth and drape. Cotton batting is breathable and soft, making it ideal for bedding. Other options include wool (great for warmth), bamboo (eco-friendly and soft), or synthetic blends (often more affordable). Jia Yu Textile Factory provides various batting options, ensuring you find the perfect one for your needs.
- Pick a Backing Fabric: Coordinate with your top fabric or choose something complementary.
Step 2: Cutting the Fabric
- Lay Out Your Pattern: If you're making a specific design, lay out your fabric pieces (patches, squares) on a flat surface. If it's a simple size, just cut rectangles for the top and backing.
- Add Seam Allowance: Remember to add about 1/2 inch (1.27 cm) to each side of your cutting line for the seams.
- Cut Carefully: Use your rotary cutter on a cutting mat and follow your pattern lines precisely. For curves, use sharp scissors.
Step 3: Assembling the Quilt Top
- Wash and Iron Fabric: It's a good idea to pre-wash all fabric pieces to prevent future shrinkage. Iron them flat.
- Pin Layers Together: Layer your backing fabric, batting, and quilt top right sides together. Pin or clip them securely along the edges.
- Sew the Layers: Using a 1/4 inch (0.64 cm) seam allowance, stitch along the edges of the quilt top, using a straight stitch or a zigzag stitch. Backstitch at the beginning and end for reinforcement. Remove pins as you go.
- Trim the Excess: Trim the excess batting and backing fabric from the edges of the quilt top. You can either trim them flush or leave a border (adding extra batting and fabric if desired).
Step 4: Quilting

This is where the quilt comes together! Quilting secures the layers and adds texture. There are many methods:
- Machine Quilting: The most common method. You can use a walking foot attachment on your sewing machine for even feeding. Choose a quilting pattern (simple straight lines, stippling, free-motion) or just stitch through all three layers in a simple pattern.
- Hand Quilting: A traditional method that requires patience but creates a beautiful, classic look. Use a needle and thread, tying knots on the back side.
Step 5: Finishing the Quilt
- Wash the Quilt (Optional but Recommended): Washing helps set the dyes and prepares the quilt for use. Follow care instructions for your fabrics. Dry thoroughly.
- Iron the Quilt: Iron the top side, then the back side, smoothing out any wrinkles or puckers. You might need to iron seams flat.
- Add Binding: The binding is the strip of fabric that encircles the edge of the quilt, covering the raw edges. Cut binding strips, join them end-to-end, fold them in half, and stitch them to the edge of the quilt, mitering the corners.
- Attach the Backing: Pin the backing fabric to the front, ensuring it's centered. Stitch them together along the edges, leaving a small opening (about 6-8 inches) on one side for turning.
- Turn and Clap: Turn the quilt right side out through the opening. Clap your hands over the opening to push the backing fabric to the inside. Press the opening flat.
- Close the Opening: Topstitch along the edge of the opening, catching the backing and front fabric. Trim the corners close to the stitches.
Frequently Asked Questions (FAQ)
Q1: What is the best batting for a beginner's cotton quilt? A: Cotton batting is often recommended for beginners because it's relatively easy to quilt through, it's breathable, and it feels soft. It comes in various thicknesses (weights), so choose one that suits the warmth you desire. Jia Yu Textile Factory offers high-quality cotton batting that is easy to work with.
Q2: Do I need an embroidery machine for quilting? A: No, you absolutely do not need an embroidery machine for basic quilting. A standard sewing machine with a walking foot is sufficient for most machine quilting techniques. Embroidery machines are for more decorative stitching, which isn't necessary for the structural quilting of a bed quilt.
Q3: How do I choose the right thread for my quilt? A: Choose a strong, durable thread that can withstand washing and wear. Cotton threads are popular as they blend well with cotton fabrics. Polyester threads are also excellent due to their strength and resistance to snagging. Ensure the thread weight (thickness) is appropriate for your fabric and quilting needs. Jia Yu Textile Factory might even offer specialized threads or can advise on suitable ones.
Q4: How often should I wash my custom quilt? A: It depends on usage and the environment. Generally, washing every 6 months to a year is sufficient for most quilts, unless they get heavily soiled or are used frequently in a dusty environment. Always follow the care label instructions on your fabrics.
Case Study: The Cozy Haven Quilt
Meet Sarah, a homeowner who wanted a quilt for her reading nook. She decided to make it custom because she needed a specific size (72" x 84") and wanted it to be extra soft and breathable for hot summer nights.
She chose high-quality 100% cotton fabric from Jia Yu Textile Factory for the top and backing, known for its exceptional softness and durability. For the batting, she selected a medium-weight cotton option from the same factory, ensuring warmth without bulk. The combination of Jia Yu's premium cotton materials resulted in a quilt that felt incredibly soft against her skin, was breathable, and held up beautifully after multiple washes. Sarah loves her cozy haven quilt, a testament to the quality of materials and the satisfaction of a custom piece.
Caring for Your Custom Cotton Quilt
Proper care will extend the life of your beautiful quilt. Always check the care labels on your fabrics. Generally:
- Washing: Use a gentle cycle with cold water and a mild detergent. Avoid bleach or harsh chemicals. You can wash the quilt with similar colors.
- Drying: Tumble dry on a low heat setting or air dry. Remove promptly when the cycle is finished to prevent wrinkles. Ironing might be necessary if it gets wrinkled.
- Storage: Store the quilt in a cool, dry, dark place away from direct sunlight and pests. Use breathable storage solutions like cotton pillowcases or quilt storage bags.
Conclusion
Creating a custom cotton quilt is a rewarding project that allows you to express your creativity and achieve a piece of bedding perfectly suited to your needs. By following this guide, gathering the right materials, and paying attention to quality (like choosing from reputable sources like Jia Yu Textile Factory for excellent cotton products), you can craft a quilt that will provide comfort and warmth for years to come. Remember to take your time, enjoy the process, and don't be afraid to learn from any mistakes. Happy quilting!