How to Make Goose Feather Quilt:A Practical Guide
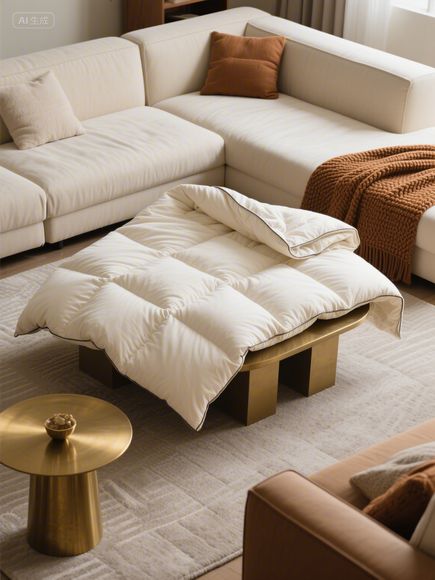
How to Make Goose Feather Quilt: A Practical Guide,Creating a goose feather quilt is an art form that combines warmth, comfort, and craftsmanship. This practical guide will walk you through the steps to create your own goose feather quilt, ensuring that even the most inexperienced quilter can create a beautiful piece of fabric art.,Step 1: Gather Your Materials,Before you start, gather all the necessary materials. You will need high-quality goose feathers, fabric, needles, thread, scissors, and a sewing machine or hand-sewing tools. It's also important to have a design in mind, whether it's a simple patchwork or a more intricate design.,Step 2: Prepare the Fabric,Cut your fabric into the desired size for your quilt. You can use a variety of fabrics, including cotton, wool, or a mix of both. Make sure the fabric is smooth and free of any loose threads or staples.,Step 3: Start Sewing,Begin by sewing the edges of your fabric pieces together, creating a quilt with curved or wavy edges. Use a decorative stitch to give your quilt a unique look. As you sew, be careful not to over-stitch, as this can make the stitches visible through the fabric.,Step 4: Add Goose Feathers,Once your fabric pieces are sewn together, start adding goose feathers. You can either sew the feathers directly onto the fabric or create a pattern using a toothpick or similar tool. Make sure the feathers are evenly distributed throughout the quilt for an even look.,Step 5: Finish Off,After you have added all the goose feathers, finish off the edges of the quilt using a binding cut on each corner. This will help to secure the feathers in place and prevent them from coming loose. Then, sew the binding cut on each corner to complete the quilt.,Conclusion,Creating a goose feather quilt is a rewarding experience that results in a warm and cozy piece of fabric art. With the right materials and a bit of patience, anyone can create their own masterpiece. So why wait? Pick up some feathers and fabric today and start your journey towards creating a stunning goose feather quilt!
Introduction: In this article, we will explore the art of making goose feather quilts by hand. This traditional Chinese craft, known as "Goose Feather Quilt," is renowned for its warmth, softness, and durability. In this guide, we will provide step-by-step instructions, tips, and tricks to help you create your own goose feather quilt. Whether you're looking to add a touch of luxury to your bed or give as a thoughtful gift, making a goose feather quilt is a rewarding experience.
Table of Contents:
- Understanding the Materials Needed
- Tools and Equipment Required
- The Process of Making a Goose Feather Quilt
- Preparing the Feathers
- Dyeing and Finishing the Feathers
- Sewing the Quilt Together
- Tips and Tricks for Better Results
- Case Studies: Real-World Applications of Goose Feather Quilts
- Advantages of Using Goose Feathers in Quilts
Section 1: Understanding the Materials Needed

To make a goose feather quilt, you will need the following materials:
- Feathers: High-quality goose feathers, typically sourced from live birds or processed feathers.
- Fabric: A soft, breathable fabric such as cotton, linen, or a blend of both. The choice of fabric depends on your preference and the look you want to achieve.
- Sewing Thread: A strong, durable thread that matches the fabric color.
- Scissors: Precision scissors for cutting feathers and fabric.
- Fabric Paint or Stain: For adding color to the feathers or fabric if desired.
- Embellishments (optional): Embellishments such as beads, buttons, or ribbons can be added for extra charm.
Section 2: Tools and Equipment Required
In addition to the materials listed above, you will need the following tools and equipment:
- Needle: A sharp needle suitable for sewing fabric.
- Thread Puller: A tool to help pull the thread through the fabric.
- Fabric Shears: For cutting the fabric to the desired size.
- Feathers Scissors: Specialized scissors for cutting feathers into uniform shapes.
- Fabric Pump or Air Compressor: To help blow the feathers into shape.
- Iron: A lightweight iron to press the fabric and feathers before sewing.
Section 3: The Process of Making a Goose Feather Quilt
Now that you have gathered all the necessary materials and tools, let's get started on making your own goose feather quilt.
Step 1: Preparing the Feathers

The first step in making a goose feather quilt is preparing the feathers. Here’s how to do it:
- Collect Feathers: Gather feathers from live birds or purchase them from a supplier. Make sure the feathers are clean and free of any dirt or debris.
- Wash and Dry: Rinse the feathers thoroughly under cold water and allow them to dry completely.
- Clean the Feathers: Use a feather cleaner or a soft brush to remove any remaining dirt or debris from the feathers. This step is crucial to ensure a comfortable sleeping surface.
- Cut the Feathers: Use feathers scissors to cut the feathers into uniform lengths. A good length for quilting is about 6-8 inches.
- Shape the Feathers: Use a fabric pump or air compressor to blow the feathers into shape. This helps create a fluffy texture that adds lightness and softness to the quilt.
Step 2: Dyeing and Finishing the Feathers
Once the feathers are prepared, you can dye them to match your fabric or add a pop of color. Here’s how to do it:
- Choose a Dye: Select a dye that is safe for use with feathers and fabric. There are many types of dyes available, including natural and synthetic options.
- Pre-treat the Feathers: Pre-treat the feathers by soaking them in a dye bath for a few hours or overnight, depending on the type of dye and desired color.
- Dye the Feathers: Submerge the feathers in the dye bath and stir gently. Allow the feathers to soak for the recommended time, usually around 30 minutes to an hour.
- Rinse and Dry: Rinse the feathers thoroughly under cold water until the water runs clear. Allow the feathers to dry completely before using them in your quilt.
Step 3: Sewing the Quilt Together
Now that the feathers are ready, it’s time to sew the quilt together. Here’s a simple method to get you started:
- Prepare the Fabric: Cut the fabric into the desired size and shape for your quilt. You can use a pattern or design that you like.
- Layer the Fabric: Place a layer of fabric on a clean, flat surface. Place a layer of feathers on top of the fabric, leaving enough space for the stitches.
- Sew the Layers Together: Use a needle and thread to sew the fabric and feathers together. Use a backstitch for a strong stitch. Be careful not to over-stitch, as this can damage the feathers.
- Add Embellishments: If desired, add embellishments such as beads, buttons, or ribbons to your quilt. Use a small amount of fabric paint or stain to add color to the feathers or fabric.
Section 4: Tips and Tricks for Better Results

To ensure a successful goose feather quilt, keep the following tips and tricks in mind:
- Take Your Time: Take your time when sewing the quilt together. Rushing can result in uneven stitches and a loose quilt.
- Use Quality Tools: Invest in high-quality tools and equipment to make your quilting experience easier and more enjoyable.
- Practice Regularly: Like any craft, making a goose feather quilt requires practice. Try practicing on smaller projects before moving on to larger ones.
- Be Patient: The process of making a goose feather quilt can take some time, especially if you’re new to the craft. Be patient and enjoy the process.
Section 5: Case Studies: Real-World Applications of Goose Feather Quilts
To demonstrate the versatility of goose feather quilts, let’s look at a few real-world applications:
- Home Decor: Goose feather quilts make beautiful home decor items. They can be used as wall hangings, throw pillows, or bed sheets.
- Gift Giving: A handmade goose feather quilt is a thoughtful and unique gift for friends and family. It’s especially popular during the holiday season.
- Fashion: Some designers incorporate goose feathers into their fashion collections. They use them to add texture and volume to garments and accessories.
Section 6: Advantages of Using Goose Feathers in Quilts
One of the main advantages of using goose feathers in quilts is their exceptional warmth and softness. Unlike cotton or other synthetic fibers, goose feathers are naturally insulating and soft, providing excellent comfort and insulation for the sleeper. Additionally, they add a luxurious feel to the quilt and can be very durable, making them a long-lasting choice for any quilting project.
Another advantage of goose feathers is their ability to add a unique texture and appearance to the quilt. The fluffy texture of the feathers adds lightness and softness, while also giving the quilt a natural, organic look. This makes them particularly popular among those who appreciate a rustic or natural aesthetic in their home decor.

Finally, goose feathers are a sustainable and eco-friendly choice. Unlike synthetic fibers, they are biodegradable and do not contribute to pollution or waste. This makes them a thoughtful choice for environmentally conscious consumers who want to reduce their impact on the planet.
Conclusion:
Making a goose feather quilt is a rewarding and enjoyable craft that results in a warm, soft, and durable quilt. By following the steps outlined in this guide, you can create your own unique goose feather quilt to enjoy for years to come. Whether you’re looking to add a touch of luxury to your bed, give a thoughtful gift, or simply practice your crafting skills, making a goose feather quilt is a fantastic choice. Thank you for reading, and happy quilting!
Expanded Knowledge:
手工制作鹅绒被的步骤
- 材料准备:选择高质量的鹅绒填充物,包括羽绒、棉花等,还需要准备被面材料,如羊毛或棉布等。
- 设计被面图案:根据个人喜好和需求,设计鹅绒被的图案和花纹。
- 手工缝制被面:使用针线将设计好的图案缝制在被体的表面。
- 填充羽绒:使用专业的羽绒填充剂填充鹅绒被的内部空间。
- 整理和缝制被口:确保被口平整,并使用线进行最后的整理和缝制。
手工制作的产品优势

佳羽纺织厂手工制作的鹅绒被产品具有以下优势:
- 高品质材料:我们选用优质羽绒和棉花等材料,确保产品的保暖性和舒适性。
- 精湛工艺:通过精湛的手工制作工艺,使鹅绒被更加美观、耐用。
- 个性化定制:可以根据个人需求和喜好进行个性化定制,满足不同人群的需求。
- 环保可持续:采用环保材料,符合现代人对环保的需求。
手工制作案例
在佳羽纺织厂,我们有一位经验丰富的师傅,他擅长手工制作鹅绒被,他使用的技巧和材料都是经过精心挑选和处理的,确保每一件产品都达到最高标准,他的作品不仅美观大方,而且保暖性能出色,深受消费者喜爱。
问答环节
Q1:手工制作鹅绒被需要哪些工具? A1:手工制作鹅绒被需要缝纫机、针线、尺子、剪刀等工具。
Q2:手工制作鹅绒被需要注意哪些细节? A2:在手工制作过程中,需要注意材料的选择和搭配、被面的设计、填充物的填充和缝合等细节。

Q3:佳羽纺织厂的手工制作鹅绒被有哪些特色? A3:佳羽纺织厂的手工制作鹅绒被具有高品质材料、精湛工艺、个性化定制以及环保可持续等特点。
通过以上的介绍,相信大家对如何手工制作鹅绒被有了更深入的了解,希望这篇文章能为大家提供有用的信息,如果有任何疑问或需要进一步的解释,欢迎随时提问,让我们一起享受手工制作的乐趣,制作出温暖舒适的鹅绒被吧!