How to Make Custom Photo Pillow Covers:A Step-by-Step Guide
This step-by-step guide provides instructions for creating personalized photo pillow covers. Learn how to select appropriate fabric, carefully attach your cherished photograph, and complete the sewing process. Perfect for adding a unique, custom touch to your home decor using basic sewing skills and materials. Follow along to transform your favorite images into beautiful, one-of-a-kind accent pillows.
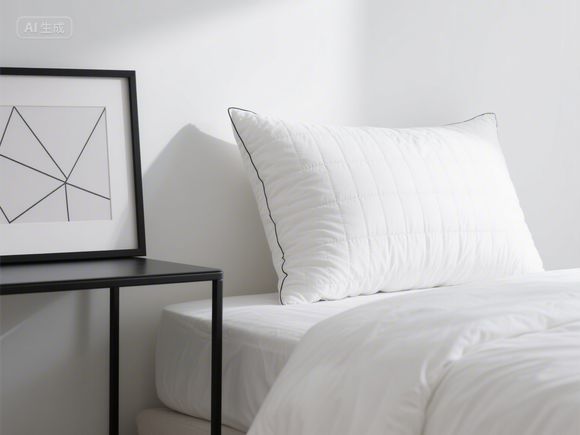
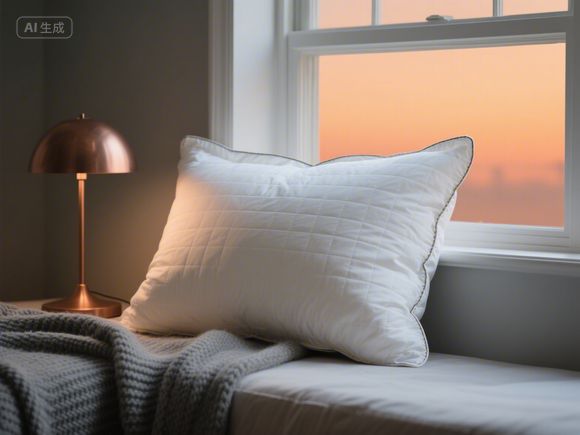
Alright, let's dive into this! Ever wanted to turn a special photo into a cozy, personalized pillow? Maybe you have a wedding picture, a family portrait, or a snapshot from a memorable trip. Transforming that into a pillow cover is a fantastic way to display it and add a unique touch to your bedroom or living space. It's easier than you might think! In this guide, we'll walk you through the process, from choosing the right fabric to adding the finishing touches. We'll also touch on professional options if you prefer to outsource the work.
Materials You'll Need:
Before you start cutting and sewing, gather all your supplies. Here's a quick reference table:
| Category | Item | Purpose |
|---|---|---|
| Fabric | Pillow cover fabric (cotton, linen, velvet, etc.) | Base material for the pillow cover |
| Pillow Insert | Standard size pillow insert (usually 20"x26") | Filling for the pillow |
| Measuring Tape | Accurately measure fabric and pillow insert | |
| Scissors | Fabric shears or sharp scissors | Cut fabric to size |
| Pins | Sewing pins or fabric clips | Hold fabric layers in place |
| Sewing Machine | Main tool for stitching | |
| Thread | Matching fabric color | Secure stitches |
| Pencil or Fabric Marker | Marking crease lines on fabric | |
| Optional: Iron | Set creases in fabric | |
| Optional: Zipper, Button, or Latch | Closure mechanism | Secure the pillow cover |
Step 1: Choosing Your Fabric and Pillow Insert
-
Fabric Selection: This is where you can get creative! Consider the feel, the look, and the photo's style.
- Cotton: Breathable, durable, easy to work with. Great for everyday use.
- Linen: Has a natural, textured look. Good for a rustic or bohemian vibe.
- Velvet: Luxurious and soft. Perfect for adding a touch of elegance.
- Flannel: Cozy and warm. Ideal for a nursery or casual decor.
- Velour: Similar to velvet but with a slight sheen. Another luxurious option.
- Embroidery Fabric: This is thicker and stiffer. It holds its shape well, making it great for pillow covers that need structure, like sham pillows (the decorative pillows placed alongside a bed). It's also fantastic if you want to add extra embellishments or embroidery to your pillow cover.
-
Pillow Insert: You'll need a standard-sized pillow insert. The most common size is 20 inches wide by 26 inches long. Make sure you have one of this size before you start sewing the cover.
Step 2: Preparing the Pillow Cover Pattern
- Measure Your Pillow: Double-check the dimensions of your pillow insert. It should be roughly 20"x26". If it's slightly different, adjust your measurements accordingly.
- Add Seam Allowance: This is crucial! You need to add extra fabric around the edges where you'll be sewing the seams. A standard seam allowance is 5/8 inch (about 1.5 cm) on each side.
- Width: Take the width of your pillow insert (e.g., 20 inches) and add 5/8 inch to the left side and 5/8 inch to the right side. So, 20 + 0.625 + 0.625 = 21.25 inches.
- Length: Take the length of your pillow insert (e.g., 26 inches) and add 5/8 inch to the top and 5/8 inch to the bottom. So, 26 + 0.625 + 0.625 = 27.25 inches.
- Create Your Pattern: You have a few options here:
- Option A (Simple): Cut two identical rectangles of your chosen fabric, each measuring 21.25 inches by 27.25 inches (using the measurements calculated above).
- Option B (More Accurate - Recommended): Cut out two separate pieces for the front and back. This is often easier for beginners.
- Front Piece: Cut one rectangle measuring 21.25 inches wide by 27.25 inches long.
- Back Piece: Cut one rectangle measuring 21.25 inches wide by 27.25 inches long, but with a smaller opening. Measure 5/8 inch in from each side and 1 inch in from the top and bottom, then cut out the center. This opening will be used to slip the pillow insert through later.
Step 3: Cutting Out the Fabric

- Cut the Front Piece: Using your measurements (21.25" x 27.25"), cut out one rectangle from your chosen fabric.
- Cut the Back Piece: Cut one rectangle from your chosen fabric (same size as the front piece). Then, measure 5/8 inch in from the top and bottom edges, and 5/8 inch in from the left and right edges. Cut out the center section, leaving a border of fabric around it. This creates an opening for the pillow.
- (Optional) Cut the Sides: If you prefer a pillow cover with ties or buttons at the corners, you'll need to cut two additional pieces for the sides. Each side piece should be 5/8 inch wide (the seam allowance) and 27.25 inches long (the length of the pillow cover). You'll need two of these.
Step 4: Sewing the Pillow Cover
- Sew the Sides (If Using Side Panels):
- Take your two side pieces (5/8" x 27.25").
- Place them right sides together (sewing side facing sewing side).
- Pin along the long edge where they meet the front piece.
- Sew using a 5/8 inch seam allowance.
- Press the seams open (fold them to the back of the fabric) or clip them slightly to reduce bulk.
- Repeat for the second side piece.
- Attach the Side Panels to the Front Piece:
- Take your front piece (21.25" x 27.25") and place it right side up.
- Take one side panel piece and place it right sides together against the long edge of the front piece.
- Pin in place.
- Sew using a 5/8 inch seam allowance.
- Repeat for the other side panel.
- Sew the Pillow Cover Front and Back Together (No Side Panels):
- Take your front piece (21.25" x 27.25") and place it right sides together with the back piece (21.25" x 27.25" with the opening cut out).
- Pin along the three edges (top, left, and right sides).
- Sew using a 5/8 inch seam allowance, leaving the opening unsewn for now.
- Turn the Pillow Cover Right Side Out: Carefully turn the pillow cover right side out through the opening. If the opening is too small, you might need to gently slit it open further or use a turning tool. Iron it flat now to remove any wrinkles.
- Press the Opening: With the pillow cover right side out, press the opening flat. This will help it lie smoothly against the pillow insert.
- Topstitch (Optional but Recommended): This is the fun part! Turn the pillow cover right side out again. Pin the opening edges to the pillow insert. Sew close to the edge (about 1/4 to 1/2 inch away from the edge) using a contrasting or matching thread. This "topstitch" hides the raw edges and gives a professional finish. You can do this by hand or with your sewing machine.
Step 5: Inserting the Pillow
- Flatten the Pillow Insert: Gently flatten your pillow insert to make insertion easier.
- Insert the Pillow: Slide the pillow insert through the opening of the pillow cover. Be careful not to snag the fabric. Give the pillow a good shake to remove any clumps of filling.
- Pull the Cover Taut: Once the pillow is fully inserted, pull the fabric taut from all sides.
- Close the Opening: Fold the opening edges neatly together and press them flat. If you used topstitching, the opening should be neatly hidden. If not, you can pin it closed temporarily while you admire your handiwork.
Tips for Success:
- Choose a Sharp Needle: A sharp needle prevents skipped stitches and broken threads.
- Thread Color: Match your thread color to the fabric for a seamless look, or choose a contrasting color for a pop of interest.
- Machine vs. Hand Stitching: A sewing machine is much faster for the main seams. Hand-stitching the topstitching or closure (if using one) gives a more delicate finish.
- Ironing: Ironing your fabric before cutting and after sewing helps keep everything smooth and professional-looking.
- Practice: If you're new to sewing, practice on scrap fabric first!
Professional Custom Pillow Covers:
Making your own pillow cover is rewarding, but sometimes you might prefer a professional finish or need help with bulk orders. That's where factories like Jia Yu Textile Factory come in. They specialize in producing high-quality, custom textiles, including pillow covers.
How Jia Yu Textile Factory Can Help:
- Customization: Jia Yu Textile Factory offers a wide range of fabric options, sizes, and finishes. They can help you create pillow covers in various colors, patterns, and textures to match your decor perfectly.
- Quality Control: They have strict quality control measures in place to ensure that every product meets high standards. This means you can trust the quality and durability of their custom pillow covers.
- Efficiency: For larger quantities or complex designs, their manufacturing capabilities allow for efficient production, ensuring you get your custom pillows in a timely manner.
- Support: They often provide support throughout the process, from selecting the right fabric to finalizing the design and handling shipping.
Advantages of Choosing Jia Yu Textile Factory:
- Consistency: Mass production ensures consistent quality and sizing for all pillow covers.
- Scalability: Whether you need one custom pillow cover or hundreds, they can accommodate your needs.
- Expertise: Their team has the knowledge and experience to handle various fabric types and printing techniques, ensuring your design is executed flawlessly.
- Reliability: They prioritize timely delivery and customer satisfaction.
Example Scenario:
Imagine you're planning a wedding. You have a beautiful, high-resolution photo of the couple. You want to display it prominently in the reception area. Instead of just hanging it on the wall, you commission Jia Yu Textile Factory to create a custom velvet pillow cover with a subtle gold border, featuring a high-quality print of the photo. This unique piece becomes a stunning conversation starter and a cherished keepsake. The factory's expertise in fabric selection and printing ensures the photo is reproduced beautifully and the pillow cover feels luxurious.
Frequently Asked Questions (FAQ):
Q1: What is the standard size for a pillow cover? A: The most common size is 20 inches wide by 26 inches long, designed to fit a standard pillow insert. However, pillows come in various sizes (e.g., Queen, King, Euro shams), so always measure your pillow insert first.
Q2: Can I use any fabric for a pillow cover? A: Yes, you can use almost any fabric! Consider the weight, drape, and care instructions. Cotton and linen are good for everyday use, while velvet or silk are better for decorative purposes. Check the fabric's care label to ensure it's suitable for your needs.
Q3: How do I prevent the photo from showing through the pillow cover? A: This is key! Use a fabric with a tight weave or a backing fabric (like muslin) underneath the photo print. High-quality digital printing methods used by professional factories like Jia Yu can also help minimize any potential show-through.
Q4: What's the difference between a pillow cover and a sham? A: A pillow cover typically covers the entire pillow insert, while a sham (or decorative pillow cover) is usually a smaller, flatter version designed to sit on top of the pillow for decorative purposes, often matching a bedspread or duvet cover.
Q5: How do I care for my custom pillow cover? A: Care instructions depend entirely on the fabric used. Always check the care label. Some fabrics can be machine washed and dried, while others might require dry cleaning or hand washing. Pillow inserts should be cared for according to their own care instructions.
Conclusion:
Making a custom photo pillow cover is a fun and creative DIY project that allows you to personalize your space. Whether you tackle it yourself or choose a professional service like Jia Yu Textile Factory for high-quality results, the end product is a unique piece that showcases your cherished memories in a cozy and stylish way. Happy sewing!
Expanded Knowledge:
Introduction
Welcome to our world of customization! Are you tired of seeing the same old pillowcases on your bed? Do you want to add a personal touch to your bedroom decor? Look no further! At Jiayu Textile Factory, we specialize in creating custom photo pillowcases that are not only beautiful but also functional and unique. In this guide, we will walk you through the process of making your own custom photo pillowcase.
Table 1: Materials Needed for Making Custom Photo Pillowcase
| Material | Description |
|---|---|
| Fabric | High-quality fabric for pillowcases, such as cotton or polyester. |
| Photo Paper | A photograph that you want to print on the pillowcase. |
| Scissors | For cutting fabric and paper. |
| Ruler | For measuring and cutting fabric. |
| Pencil | For marking the fabric. |
| Sewing Machine | For sewing the fabric pieces together. |
| Needle | For threading the sewing machine. |
| Thread | For sewing the pillowcase. |
| Optional: Embellishments | 珠子,蕾丝,贴纸, etc., for added decoration. |
Step 1: Choose Your Design
The first step in making your custom photo pillowcase is to choose your design. Do you want a simple image, or are you looking for something more elaborate? Here are some tips to help you decide:
- Consider the size of your pillowcase and the image you want to print. Make sure the image fits well within the limits of the fabric.
- Think about the color scheme of your bedroom. Choose colors that complement your existing decor.
- If you're not sure what design you want, you can also take inspiration from photos or artwork.
Step 2: Print Your Photo
Once you have chosen your design, the next step is to print it on the fabric. You can use a home printer or a professional printing service. Make sure to choose high-quality paper that provides clear, vibrant images.
Table 2: Tips for Printing Photos on Fabric
| Tip | Description |
|---|---|
| Use High-Quality Paper | This will ensure that your photo looks clear and sharp. |
| Adjust Print Settings | Play around with the print settings to get the desired effect. |
| Let the Paper Dry Fully | Allow the ink to dry completely before moving on to the next step. |
| Frame Your Photo | Consider framing your printed fabric to make it more stylish. |
Step 3: Cut the Fabric

After printing your photo, the next step is to cut the fabric. Use a ruler to measure and mark where you want to cut the fabric. Then, use scissors or a rotary cutter to make the cut.
Table 3: Tips for Cutting Fabric
| Tip | Description |
|---|---|
| Use a Sharp Knife | A sharp knife will make clean cuts every time. |
| Cut on the Cross Pattern | This will help you make straight cuts. |
| Be Careful of Sharp Edges | Use protective gear like gloves and goggles. |
| Cut on Both Sides | Cut the fabric on both sides to avoid fraying. |
Step 4: Sew the Fabric Pieces Together
Now that you have cut the fabric, the next step is to sew the pieces together. First, fold the fabric in half and press the seam flat. Then, use a sewing machine or a needle and thread to sew the two halves together, leaving a small opening for filling.
Table 4: Tips for Sewing Fabric
| Tip | Description |
|---|---|
| Use a Thimble | This will protect your finger when pushing the needle through thick fabric. |
| Secure the End of the Thread | Tie the thread securely before sewing the next stitch. |
| Use a Backstitch | This will provide a stronger stitch and prevent the fabric from fraying. |
| Check Your Seams | Make sure your stitches are even and that there are no loose ends. |
Step 5: Fill the Pillowcase
After sewing the fabric pieces together, it's time to fill the pillowcase with your choice of filling material, such as down, fiberfill, or foam. Make sure the filling is evenly distributed throughout the pillowcase.
Step 6: Sew the Opening Closed
Once the pillowcase is filled and the opening is secure, sew the hole closed using a needle and thread. Make sure the stitches are even and that the opening is completely sealed.
Step 7: Add Embellishments (Optional)
If you want to add embellishments to your custom photo pillowcase, such as beads,蕾丝,贴纸, etc., do so now. Use a needle and thread to attach the embellishments securely.
Conclusion
Making your own custom photo pillowcase is a fun and rewarding project that allows you to personalize your bedroom decor. At Jiayu Textile Factory, we are committed to providing high-quality products and exceptional customer service. We offer a wide range of customization options, including different sizes, colors, and designs. Visit our website or contact us directly to learn more about our products and services.
Case Study: Custom Photo Pillowcase for a Customer
Let's take a look at an example of a custom photo pillowcase that we created for a customer named Sarah. Sarah wanted a personalized pillowcase with her favorite photo of her family. She provided us with the photo and a description of the design she had in mind. We followed the steps outlined in this guide to create a beautiful custom photo pillowcase that Sarah loved.
Sarah was thrilled with the final product and couldn't wait to use it in her bedroom. She said that the pillowcase looked exactly like she had imagined and that it added a personal touch to her bedroom decor. She also appreciated the quality of the fabric and the attention to detail that went into creating the custom pillowcase.
As you can see, making custom photo pillowcases at Jiayu Textile Factory is a simple and enjoyable process that results in a unique and personalized product. We are confident that you'll love the result as much as Sarah did.
Product Advantages of Custom Photo Pillowcases
Custom photo pillowcases offered by Jiayu Textile Factory come with several advantages that make them a popular choice among customers. Here are some of the key benefits:
-
Personalization: The most significant advantage of custom photo pillowcases is the level of personalization they offer. By using your own photograph, you can create a pillowcase that perfectly reflects your style and personality. This makes them a great gift idea for friends and family members.
-
Uniqueness: Custom pillowcases are unique and one-of-a-kind. Unlike store-bought pillowcases, which often feature standard images and designs, custom pillowcases allow you to express your individuality and creativity. This makes them a great addition to your home decor.
-
Durability: High-quality materials are used to make custom photo pillowcases, ensuring that they are durable and long-lasting. Unlike regular pillowcases, which can easily become torn or damaged, custom pillowcases can withstand wear and tear and maintain their appearance over time.
-
Comfort: Custom photo pillowcases are comfortable to sleep on, thanks to the high-quality fabric and填充材料 they are made from. Whether you prefer a soft and fluffy filling or a firmer structure, there is a custom photo pillowcase available to suit your needs.
-
Versatility: Custom photo pillowcases can be used in various settings, such as bedrooms, bathrooms, and even as gifts for friends and family members. They are versatile and can be easily adapted to different styles and preferences.
-
Affordability: At Jiayu Textile Factory, we offer custom photo pillowcases at competitive prices, making them an affordable option for anyone looking to add personalized decor to their home. Additionally, our customization options allow you to create a unique pillowcase without breaking the bank.
In conclusion, custom photo pillowcases offered by Jiayu Textile Factory are a great way to express your individuality and creativity while enjoying the comfort and durability of high-quality materials. Whether you're looking to personalize your bedroom decor or give a unique gift, custom photo pillowcases are sure to impress.